
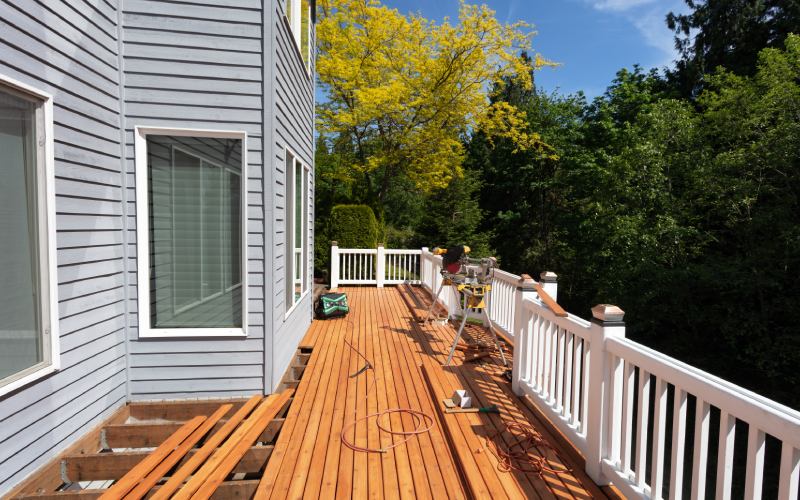
A deep power washing or scrubbing with a brightener-cleaner is an essential step when preparing an aged wood deck for refinishing, but this action causes the wood fibers of the decking, steps, and railings to swell and lift away from the wood as they expand with water. Once dry, these wood fibers can remain raised and may cause splinters. For this reason, light but thoroughly sanding your wood deck is a necessary step before staining or sealing. This crucial step will ensure that your refinishing job gives great results.
Sanding The Wooden Deck Boards
Testing Your Current Deck Stain
While it’s tempting to simply jump in and sand your entire deck surface with an orbital sander and some sandpaper you found lying around, doing your prep properly can help reduce the incidence of common deck sanding issues.
Start by examining your deck for any protruding nails or screws or rotten wood. Fix these issues before you even consider moving onto the next step.
Staining a brand-new deck is a relatively simple process, but it becomes more complicated if you have an old deck. Some older pressure-treated lumber may contain arsenic, and sanding this wood surface would be incredibly hazardous to your health.
Manufacturers of pressure-treated pine stopped adding arsenic in 2003, so do your research before you start sanding. If you have a new deck or an older deck built from redwood or tropical hardwood such as teak, you should be fine.
The type of sander you choose will depend on your deck:
- A belt sander is great for the first round of sanding. Belt sanders struggle with smaller spaces, but they’re excellent for a large surface area.
- A drum sander or power sander is ideal for removing stubborn paint and stains. Drum sanders can do a lot of damage if you’re not careful, so use them with caution.
- Orbital sanders are incredibly easy to use and a common DIY and deck project tool. They provide gentle sanding that’s great for softer wood, especially if you start with coarse grit sandpaper and work your way to a finer grit.
- A random orbit sander has more power and is great for sanding decks with stubborn paint or stains.
- The detail sander, or palm sander, is your go-to tool for fine details like railings, corners, and board sizes.
If your deck is old, or it’s the end of winter, and you haven’t cleaned it for a while, consider using a power washer before sanding. It will eliminate the debris on the top layer of wood and make your sanding experience much more hygienic and pleasant. It’s also important to rinse the wood after sanding. You can use a garden hose, or a pressure washer for this. This will remove any sawdust that is present on the surface. Sawdust that is left on the surface while staining will create an uneven, blotchy appearance.
Make sure to utilize proper safety gear, including a respirator and eye protection, to protect your health through the process. Don’t make the mistake of neglecting your protective gear: sanding results in wood dust, which can cause damage to your lungs if inhaled.
Sanding Railings And Board Sides
Sanding a deck board is a relatively simple process, but sanding railings and board sides can be tricky. We recommend either using a detail sander or hand-held sandpaper to do the job. Make sure to choose the right grit for your wood type – harder woods require coarser grit than soft woods.
Staining
Once you’ve got your whole deck sanded, the next step is to give it a proper clean. Pressure washing with an oxygen bleach deck cleaner is an excellent option that removes excess grime, mildew, and oils that can inhibit deck stain absorption. Any deck stained without proper cleaning will have an uneven finish due to these minuscule imperfections.